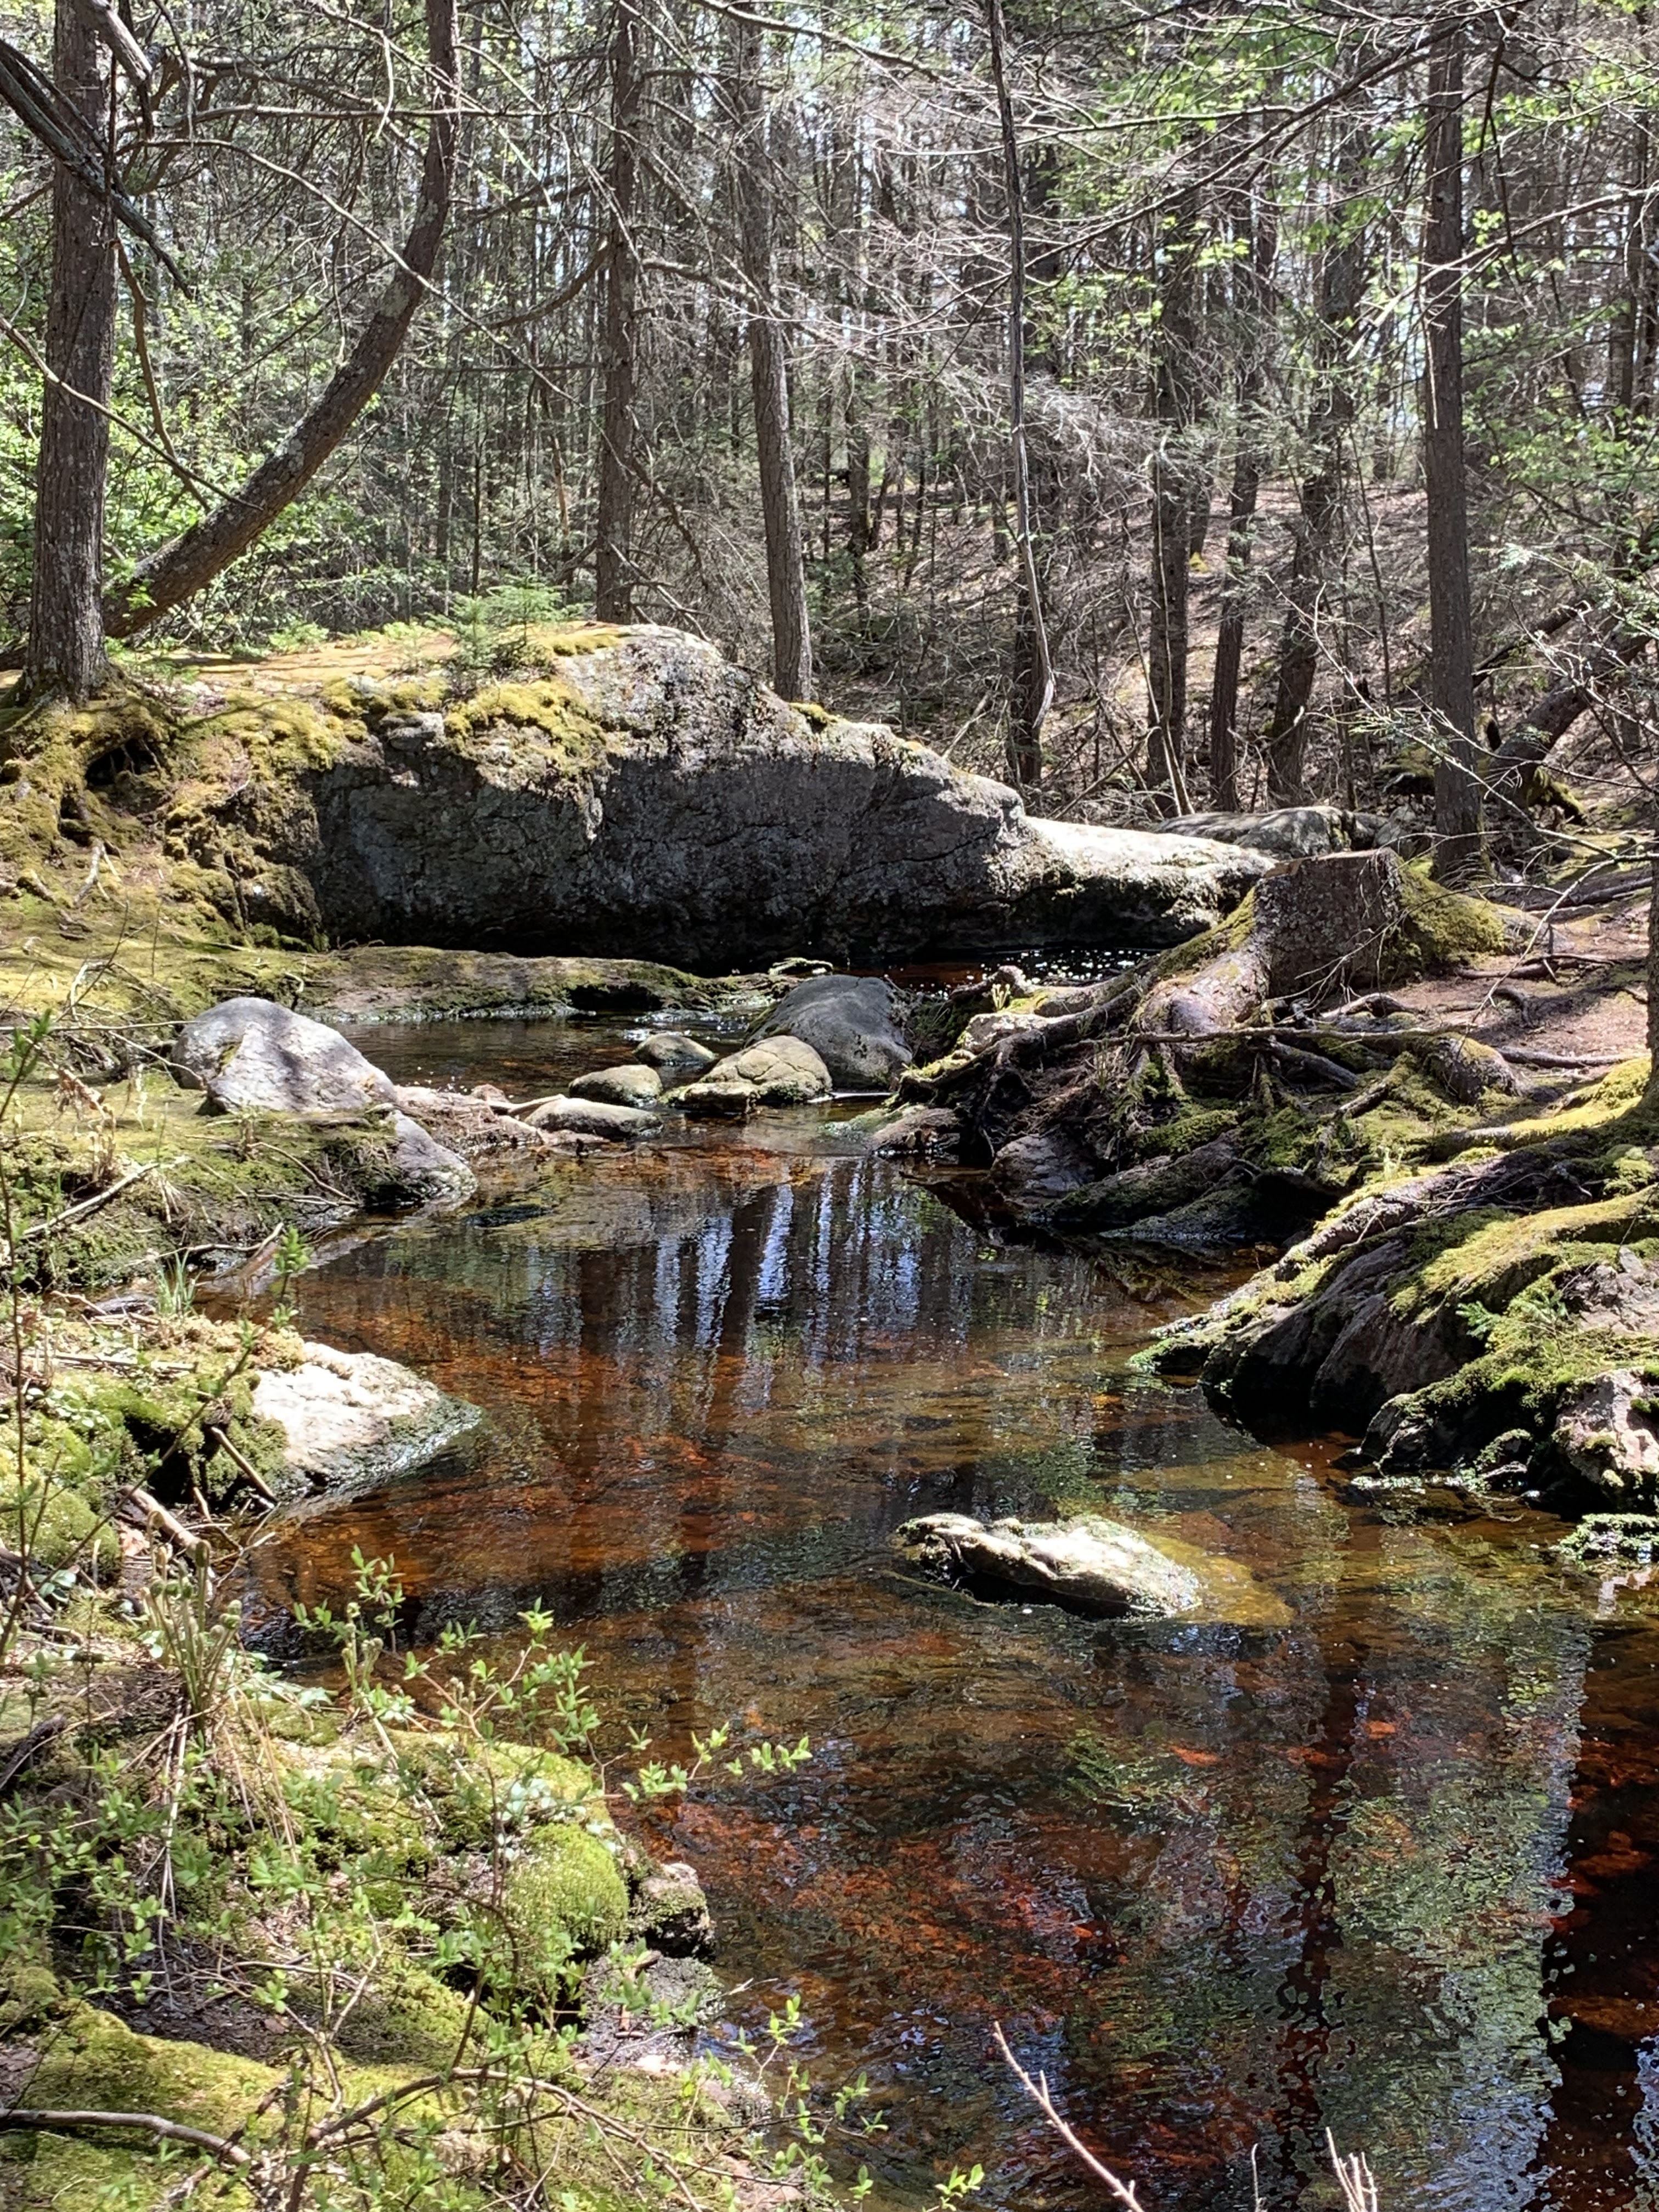
After a hiatus due to the pandemic, the Maine Pottery Tour is back! It's happening this year on May 1st & 2nd with 43 studios participating.
Wicked Cozy
Beautiful living, Maine style
Thursday, March 25, 2021
Get Ready for the Maine Pottery Tour!
Sunday, December 27, 2020
The Seed Order
It's always a bright moment in my Maine winter, the day I place the order for the seeds from Fedco that will become next year's garden. Usually I prefer to wait until mid-January, when winter is deepest and seems like it will never end, to give me that pinpoint of hope, but I'm told waiting might result in not getting the seeds I want this year, and I do want the varieties I've chosen for good reasons.
I only have so much space, so every year I am torn between my favorites & trying something new. Here are this year's choices:
Garden Peaches - Also an early tomato; in Maine the growing season is fairly short, so I've learned not to waste it on 90-day germinators, no matter how amazing they sound. These are yellow, 2-inch tomatoes, very flavorful & pretty in salsa.
Oregon Spring - New to me this year, and said to be a hedge against a cool summer. Pruden's Purple - I think I had these in the garden several years ago, so not entirely new. They are a full size tomato - a whole pound per fruit - with a mere 72-day germination. We shall see whether that rings true.
Tuesday, December 22, 2020
The House Smells Amazing: How to Roast Garlic
Aluminum foil or a garlic roaster
If using foil, lay flat a square large enough to completely wrap around the garlic head. Bend up the sides to make a bowl shape.
Remove as much of the paper skin as you can without taking apart the head
Cut off the tips - not the root end! - of the cloves
Put a teaspoon of water in the roaster (or foil bowl.)
Place the head root end down in the water.
Drizzle oil over head. Sprinkle the tiny bit of salt.
Place in cold oven; turn up to 400°. Roast for 45 minutes
Remove from oven. Scoop soft cloves out with tip of knife to spread on bread, or use in dressings or sauces.
Sunday, December 6, 2020
Sugar Cookies for Christmas
I'm not much a baker. I do love sweets but honestly the world conspires to put cakes and brownies in my path; I don't need to go to all the effort of baking them. Anyway who has time for stuff like that? But I'm a potter, and the pandemic has fucked with my livelihood most truly - all my holiday events have been cancelled. The lemonade from those lemons? This year I have the time.
I have fond memories of making sugar cookies with my sister, as a child. Here's the thing about most sugar cookies: they exist to be beautiful. For the fun of decorating them, for the pleasure in admiring their icing. As a general rule they taste...fine.
If you are using buttercream frosting, they are a vehicle for getting that to your mouth in the prettiest way possible. If you are using royal icing, well, that hasn't got an amazing flavor usually, either.
In my usual fashion, I am leaping right in with alterations before I have even tried the standard way, because I want to make cookies that taste great and look amazing. I really want the experience of decorating them - that's the fun of it - but that's not a satisfying experience if the cookies are only ok.
2 things are wrong with sugar cookies: too dry, and insipid flavor. I added a little more butter, and some almond extract which also serves to add some moisture. They taste like those almond horseshoes that fancy-schmancy bakeries sometimes have.
Almond Sugar Cookies
1 cup sugar
1 egg
Do the same for the other half.
I'm not gonna try to teach you how to flood cookies or pipe decoration; I am an absolute amateur at this & you'd be better off to watch videos from My Little Bakery or Sweet Amb's.
Here are some of my steps in the process:
The piping was actually the hard part! The trees came out pretty much as I envisioned; the little churches, not so much. |
Those are kinda janky.
Wednesday, November 25, 2020
My First Pie!
Well, I'm skipping salad; I love it but Doug has no interest, and it's really only good the first day, so there would be a ton of waste. It's not like I could freeze it! We're having a turkey (it's 12.5 lbs, and it actually a bit comical to look at; it's like a miniature), stuffing, potatoes, brussels sprouts...and pumpkin pie.
I've never made a pie of any kind before. People keep telling me it's easy, but then there are all these confusing things like, you have to bake it 3 different ways? But it just didn't seem like Thanksgiving without it, so I decided to give pie a chance.
I decided store-bought crust would have to do, because pastry is notoriously tricky to get right. I bought a box of pre-rolled rounds. That actually turned out to be the troublesome part - I didn't know it would shrink! So after I had partially baked the crust I noticed it was now too small for the pan & tried to slap on some patches. Good thing this pie will not be entering any beauty contests!
Here'd the filling recipe, from my sister-in-law, the reigning queen of pies in our family:
Aces High Farm Pumpkin Pie FillingSo, it's out! Boy is this an ugly pie. Smells good, though! I'll report back tomorrow on the important bit: how it tastes.
1 can (1 lb.) pumpkin (One Pie is best, from just up the road in Fairfield, Maine)
3/4 cup sugar
2 eggs
1/2 tsp. salt
1/2 tsp. ginger
1/4 tsp. cloves
1 tsp. cinnamon
2/3 c. evaporated milk or light cream
Preheat oven to 425F. Prepare pastry. Beat eggs slightly, then beat in remaining ingredients. Pour into crust. Bake 15 minutes. *Then, reduce heat to 350F and bake 45 minutes more or until a toothpick inserted into the filling comes out clean. Serve each slice with a dollop of whipped cream on top if desired.
Important notes:
*It's a good idea after the first 15 minutes of baking to cover the
pie crust with strips of aluminum foil to prevent burning.
Sunday, October 4, 2020
Oven's Mouth, Boothbay, Maine, October 2020
Sunday, September 27, 2020
An Embarrassment of Spuds
When you think fall in Maine, you might think of apple picking. (And you wouldn't be wrong! It is a fun fall activity and fresh-fresh-fresh apples are just incredible.) Another fall harvest is just as plentiful, though. The French name translates to "apples of the earth:" potatoes.
There are no pick-your-own potato farms that I know of, it being a messier and less picturesque activity, but farm stands are full of native potatoes, and in the grocery store the prices can't be beat.
How to take advantage of all this bounty, when the two of us can only eat so many potatoes? (Especially when the apples are beckoning, as well!) In the past when I have tried to freeze stews or soups that contain potatoes, the results have been...not great. The potato chunks have a weird spongy texture. Trying to freeze raw potatoes has not gone any better - those were somehow both grainy and mushy.
I knew I must be doing something wrong, because frozen french fries and hash browns are a thing. I can't flash-freeze, but I can blanche, which, it turns out, is the secret to home freezing potatoes. Here's how:
Cut the potatoes into wedges. It doesn't have to be exactly this size and shape, but you don't want your chunks too small, because you don't want them to get too thoroughly cooked before freezing.
Put a big pot of water on the stove on high. Set a timer for 2 minutes.
While waiting for the water to boil, fill a bigger pot with cold water & ice cubes. This is the ice bath to stop the potatoes from continuing to cook after you drain them.
Once the water on the stove boils, put in the potatoes and start the timer.
When the timer goes off, drain hte potatoes in a colander and put them immediately into the ice bath. Leave them in the ice bath for a few minutes, them scoop them back into the colander with a slotted spoon. Let them drain completely, then divide them into freezer bags and pop them into the freezer.
Frozen potatoes will stay good for about a year - not that I need to worry about that, I expect we will eat these sometime in the bleak midwinter. That's the point of buying lots while they are cheap - then you save on shopping when you have less money.