Showing posts with label Crafts. Show all posts

Sunday, June 9, 2019

Where the Road Took Me: Tandem Glass Gallery & Studio


Yesterday was a glorious day in Maine - sunny and dry, mid-70s. It was a fine day for a little road trip, and I happened to have one on my list: I needed to deliver pots to a new shop in Wiscasset, Mid-Coast Craft. More about them later! Today I want to tell you about my unexpected find.

It being said glorious day, and me in no hurry, I planned to stop at the numerous yard sales one always finds on Route 27 between Augusta and Wiscasset on a fine summer Saturday. The first sign I saw pointed the way down 127, which runs between Dresden and Woolwich (pronounced wool-itch, which always makes me laugh, as wool usually does itch.)

I was surprised to discover the advertised sale was at this amazing glass blowing studio, Tandem Glass. The upper floors arr living space, the lower is studio and gallery. I was immediately hit with a pang of jealousy. Look, there's even a outbuilding which would make a stellar kiln shed! I wouldn't want to mow all that lawn, though.

Inside was even more amazing: a sunlit gallery space glittering with beautiful handblown glass:


And the studio! I admit I am a sucker for a tidy studio - I should probably keep my own cleaner. The furnaces were cool the day I was there. And look at the enticing rack of canes! Materials are inspirational, all on their own.


It's maybe a mile - no more than that - off 27 in Dresden. Worth a trip! 

Friday, April 28, 2017

Dessert at the Portland Pottery Cafe


I've been meaning to post this for a while! A few weeks ago I hosted a date night event at Portland Pottery - couples spend an hour or on a wheel-throwing lesson, then have dinner.

The dinner was great but the DESSERT was amazing. So amazing i am still thinking about it weeks later. A cylinder of mascarpone with walnuts, surrounded by raspberries, chocolate gelato, and a wedge of fruit pastry.

Chef Manda does not offer this particular work of art every day. There are always a few cheesecakes, bars, macaroons, and cakes to choose from, but if I want something like this, I am going to have to make it myself. And where do we go to learn new skills? Why, youtube, of course!

I decided I am going to try this for Mother's Day, when I will have a small but forgiving audience of family. Will keep you posted! In the meantime go say hi to Manda & Kevin at the PP cafe. Tell 'em Lori sent ya.

Sunday, February 5, 2017

This Old House: New Numbers!

I've been meaning to replace my house numbers for like 11 years now. It's been on the list. It's a pretty long list, and included This Old Staircase, but I am knocking a few items off it, one at a time.

My old address numbers were just the ugly plastic ones you get from the hardware store. They were so old and faded the numbers were hard to read from any distance, so needed to be replaced, but since I had it in my head to make the new numbers out of stoneware, I kept putting off replacing them.

This project, like so many others, refused to do itself.
The old numbers

Making the stoneware numbers was not at all difficult. I am a potter in real life, all the materials - not to mention the kiln - were readily available to me. As you can see in the photo, I broke one of the numbers in transport; I went ahead and used it anyway. I had already waited 11 years for these numbers, I didn't want to wait one more firing cycle.


I am thinking of taking orders for these! $10 per number, choice of purple, yellow, blue or black...whaddaya think?

Saturday, January 14, 2017

This Old Staircase: Am I Done?


I kind of want to be done. This project is entertaining but I've got other stuff to do, you know? Doug thinks it's done. But...

But, damn it...my aesthetic intuition says it is not yet done. Specifically, the contrast between the white stencil and the teal of the riser is too stark, and needs either a balancing contrast - some accents in gold, maybe, or scarlet - or to be stencilled over, in kind of a double-exposure effect, with one of the lighter teals already a part of the design.

In any case I am done for today. I'll sleep on it and look at it fresh tomorrow.

Monday, October 6, 2014

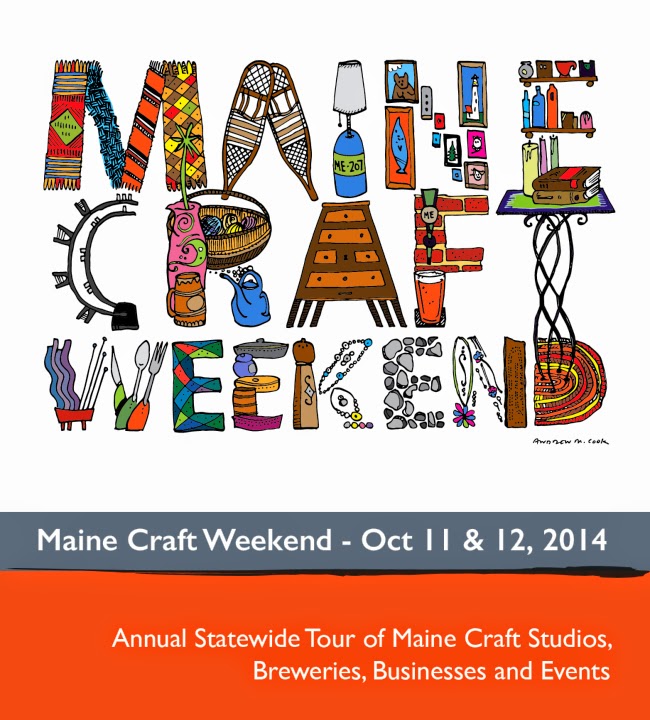
Maine Craft Weekend!


In conjunction with American Craft Week, this coming weekend is Maine Craft Weekend! Click here for a list of events and participating studios and breweries.

So far we've had a fabulous autumn, and this weekend looks great as well. Meet the artists, have a brew, get a jump on Christmas shopping, and peep at some leaves, while you're at it.

Wednesday, August 20, 2014

Check Out Quench!!

Belfast, Maine is an adorable little town. Many unusual stores, restaurants, and pubs, and right on the water. It's a great destination for a day trip, and it just got a tiny bit better. Jeweler Jennifer Lisa, of Quench Metalworks, has opened a retail space of fine and unusual handmade wares. Let's check it out!
We found it! Quench is at 9 Beaver Street, in Belfast.
Peeking in the window...

...And lots more! Worth a visit to see for yourself.

Monday, January 27, 2014

An Old Craft is New Again: Making Soap


Not me, thank goodness!
In the Colonial era, when the Province of Maine was a part of Massachusetts, the making of soap was a household chore and thus a commonly known skill. Soap was made by boiling animal fats with lye obtained from wood ash to produce the saponification reaction. Women, mostly, were the producers if soap for their families; there were also tradesmen called chandlers (because they also made candles) or soapboilers from whom one could purchase pre-made bars.

These days, of course, soap is readily available and affordable, but handmade soap is, for some a creative hobby or business, and for others a delightful luxury. We can luckily skip the smelly and unpleasant boiling of wood ash step, and just purchase lye at the hardware store, or online. What happens next looks different but is essentially the same process that the colonial inhabitants of Maine utilized.

Winter is soaping time for me, since gardening is out!

I make soap in a slow cooker, purchased at Goodwill for the purpose. I needed a number of smaller tools as well: a metal spoon and a wooden one; an immersion mixer, to blend the lye mixture without splashing it; and a big measuring cup - glass, not plastic.


Here's my recipe for Cold Process Soap. If you want to try it, you'll also need rubber gloves, protective goggles, and a soap mold lined with freezer paper.


Crisco 272 oz
Canola Oil 272 oz
Lard 181 g
Coconut Oil 181 g
Water 345 g

Lye 126 g

Weigh out the fats & oils and place them in the slow cooker on Low. When they have fully melted, turn slow cooker to Warm.
Weigh out the water and put it in a glass container. Put on your gloves and goggles and weigh out the lye. I go outside for the next bit, to release the fumes there. Always add the lye to the water, not the other way around. Slowly and carefully pour the lye into the water. The mixture will turn cloudy and get hot. Still with a metal spoon until it clears - should be just a couple minutes.

Still wearing your gloves and goggles, slowly pour the lye solution into the melted fats in the slow cooker. Stir briefly with a spoon and then begin using the immersion blender. Blend for a few minutes, and then stop, to keep from burning out the tool. Keep this up until the mixture reaches trace.

Wait, what's that mean? you may be thinking. Trace is a state of the lye/fat mixture in which the material thickens to the point that your stir marks will remain on the surface for a few seconds. If you dribble a bit of the mixture onto its surface, it will take a few seconds to sink back to level. Once the mixture reaches trace, you can be confident that your fats and lye mixture will not separate.
Soap at trace

At trace, I add the fragrance and colorants.This batch is called Stormy Night, for which I used a purple soap colorant, in two different concentrations, for a lighter and a darker shade. I poured the two together, but just barely mixed the batch, because I wanted the two colors swirled together. This batch I layered with some gold mica - sorry, not enough hands to take a photo of the layering process! 


A dusting of mica on top, and then the mold is covered and wrapped in towels to hold the heat in, aiding the saponification process.
The following morning, the soap can be unmolded and sliced, but it will still be a few weeks - at least four - before it is usable. The longer it cures, the harder and longer lasting your soap will be.